Monday, 28 March 2011

Brief

Brief
TO COMMUNICATE A PIECE OF MUSIC INTO AN ANIMATED SERIES OF IMAGES.


You will be allocated a piece of music which you must listen to and familiarise yourself with and choose three descriptive words which are inspired by the music. This choice must be intuitive and based on your emotional response to the music. The research process will therefore take a visual form once the words have been chose, and will be about making and doing.

I have been allocated the piece of music 'Solta O Frango' by Bonde Do Role, i came across the video on Youtube, which was created in 2007.
Give it a listen...


Sunday, 27 March 2011

PRINT TO PIXEL
I have never done anything in animation before...this should be fun!


Define animation- simulation of movement created by displaying a series of pictures, or frames. Cartoons on television is one example of animation. Animation on computers is one of the chief ingredients of multimedia presentations. There are many software applications that enable you to create animations that you can display on a computer monitor.
Note the difference between animation and video. Whereas video takes continuous motion and breaks it up into discrete frames, animation starts with independent pictures and puts them together to form the illusion of continuous motion.

Saturday, 12 March 2011

Final Idea

This is my final piece for task 2, overall i am fairly pleased with my final outcome. I wanted to keep the poster quite plain and simple with only a few colours. This was because i noticed that GF Smith paper followed a similar theme throughout there work. I feel keeping the poster simple is the best way to get a message across, as very often people wont stop to read a poster the message just needs to jump out at you.


I would have loved my poster to have a white background, but unfortunately due to the paper forms being white the depth of the letters got lost. If i had more time i would like to try making the paper forms out of colour and seeing what different effects i could create.

more,more, more development

I decided to take my final poster design onto photoshop and have a play around with different colours and techniques.

This was my first poster idea.


I quite liked this poster idea, but i didn't think the layout was completely right, i then had a go of moving around the typefaces and seeing what the best outcome was. I decided to make all the type white as i thought the red was a bit random since there wasn't any other colour on the page. 
This is my outcome.


I decided to add colour in a different way by adding a red tint to the image, i think this works better. I also prefer all the writing being plain white as it keeps the poster simplistic.

Before i printed my work i had a mess around in photoshop to see if this was the best possible outcome.


I tried adding a black + white effect to my poster, i wasn't really keen on this as i thought it was quite boring.


Along with changing the brightness and contrast, After playing around with the design i decided i preferred my first outcome.


Thursday, 10 March 2011

Chosen idea & Development

For my final idea i decided to do a Yulia Brodskaya inspired piece. I think the '100 years; is the most important part of the poster so i really wanted to get this across in my final design. I decided to have the '100 years' as the main feature as my poster.
Here it goes...

I first started off by thinking of different ways in which i could create the letterforms but keeping them legible, i sketched out a range of different options before i started creating. 

For some reason i had the most problems with trying to decide which way to set up the '100' of my '100 years', I decided to have a go placing the form in different ways, and taking photographs before i got to the workshop.
This way i knew exactly which way to set it up without wasting anytime.


This was the idea i decided to go with, i like the way the design flows and think it will be easy to work with for my final poster design.


The '00' looks too squashed and over crowded...

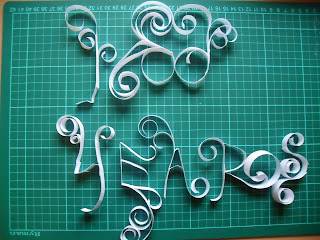
Once i got into creating the letterforms i started to quite enjoy it, i found the best letters were the ones i didn't really think about, just adding curls of paper where i found necessary. I decided to create the '100 years' with white paper, this was so i could potentially play around with different colours once they were photographed, rather than choosing a colour and being stuck with it. 

Final '100 years'.

After the form was created i took a range of different photos so i could begin on the rest of my poster. I firstly started off by taking the form on a white sheet (silly idea), after a few photos i realised i just wasn't getting the depth and shadows in the letters like i wanted.


I also realised that the poster needed to be portrait, so this photograph wouldn't be acceptable.

I then went on to take photos of the forms on a black sheet, i found this to be much more effective and the shadows and depth of the forms really started to show. 


Now all i need to do is create a poster...

Wednesday, 9 March 2011

Poster Inspiration

Decided to collect some research on posters in hope that it might give me some ideas! The first artist i stumbled across was Yulia Brodskaya, her work is beautiful but all looks very complicated! I particularly like the simplicity behind the plain white pieces she has created.


Chloe Fleury- A french artist illustrating the things she loves in life, i came across a range of poster designs she made from paper. Although they are very different to Yulia's i love the quirkiness to them.


Design Therapy

I was searching through the internet for inspiration for my final poster design, when i came across a blog called 'Design Therapy'. The designs were made by artist Rosemarie Fiore from New York, the designs were composed by exploding and containing live fireworks, this results in large bursts of saturated colour, which overlap to create this abstract composition.

A piece of work in the making, as nice as it looks,  I'm definitely too scared to try it out!


Some examples of the finished product:


Although these pieces of work are not made from just paper, i love how they have used paper as a source and the bright colours it creates. I am going to look into using bright coloured paper and fireworks (not the real ones!) as my theme for 'Celebrate'. 

http://www.artatheart.co.uk/artatheart/paper/page/1/

There's too many to choose from!
Amazing...

Celebrate

While reading through the brief over and over, i noticed the main word stressed throughout was 'celebrate'. I then started to think of, what things do i celebrate? Or, what do i normally do to celebrate? 


Here are a few examples of what the word celebration means to me...
(documented in sketchbook)


'To observe (a day) or commemorate (an event) with ceremonies or festivities'
http://dictionary.reference.com
  • Fireworks
  • Balloons
  • Parties
  • Cake
  • Champagne
  • Bright colours
  • Laughter
I then went on to get some secondary research of things i associate with celebrating...


Balloons- I especially love this picture, everyone looks happy and full of celebration. The balloons also look as if they have been let go at one particular moment, as if to celebrate.


Fireworks- I quite like the idea of fireworks for my final piece, colourful, bright and always a sign of celebration.


Cake- I love this picture of a cake, it reminds me of a present, two of the main things given to a person in order of celebration. I am going to look into using the idea of a cake/present for my final piece.

Starting to think about task 2

For task 2 we were asked to design and create a poster for GF Smith Paper Company, celebrating its 100 years in the trade. Before this brief i didn't know much about the company and what they did so i thought it would be a good idea to get some background knowledge.
 While looking through the companies website i was immediately drawn to the logo...


They have almost used a repeating pattern to create the word 'GF Smith'. The shape used to create the letter 'F' has been used several times throughout the design just flipped, reversed and with a few extra add ons. I think the simplicity behind this design works very well.

I then went on to look into common designs the company produced, this will be useful to my project to help me create a range of ideas for my poster design.
Here are some examples of work by GF Smith Paper:


I love the fluorescent pink colour used here, it instantly draws your attention. I also noticed while looking through other designs, they don't tend to use alot of colours within their work, most designs are limited to 2 or 3. I will keep this in mind when designing my final piece.


All designs produced by GF Smith Paper follow a similar style- angular/straight photos of the work, very crisp bold fonts and a limitation of 2 or 3 colours. I will try and incorporate a similar style into my own piece.

Saturday, 5 March 2011

These are the photos i took of my final piece, overall i am very pleased with the outcome of both my final model and the photographs. I decided to take my photos in black and white as this shows the pleats and folds of the flowers i also think the shadows created by the piece create a nice finished effect.


I decided to keep half of the model showing the pleats of the concertina, this was because i loved the contrast between the two, the soft petals against the harsher pleats.


Friday, 4 March 2011

Final Idea

Finally! I have created my final paper sculpture, after several pin pricks later...


I firstly needed to created the flowers, i decided to use a previous flower i created (see below blog).


To create the flower i needed 6 A5 pieces of paper and one piece of string, placing the pieces of paper one on top of the other i then went on to form a concertina in which i tied together with a piece of string.


After i had created a few concertinas to get me started, it was then time to start constructing the flower... 
In order to do this i had to pull each piece of paper in the concertina towards the middle, this creates a ruffle effect which looks like the flowers petals.
Once you have done this to all 6 pieces of paper on both sides this is your outcome...


I then went on to create lots of the same design, ready for them all the be stitched together!

I then decided in order for the form to have the best shape and chance of staying together i needed to make a form to attach each flower too. I kept with the theme of the concertina but this time made 4 A4 sized concertinas. I then attached them together in a an 'X' shape.


This left me with a bases to work on so i could then add the flowers.

Getting into the idea.


This is the start of my flower bomb, i quite like the idea of still being able to see the concertina,  i just need to decide whether or not to continue adding more flowers.

Thursday, 3 March 2011

Secondary Research

I decided to keep with the ideas of flowers for task 1, I found it the most interesting form to come up with, and i love the final outcomes. I was looking through the internet and came across paper 'flower bombs'.


I particularly loved these designs, i love the bright colours and they way they look all bunched together. I have decided i would like my final piece to hand in a similar fashion. Although my final piece has to be made out of just white paper i am going to explore into the best way to create such an effective final piece.


Brian Dettmer

While looking through the internet i came across artist Brian Dettmer, his work amazes me! The pieces below are created by glueing the edges of the book together and simply removing parts of pages to create this desired effect. I can't quite get my head around it, but its pretty impressive!


Wednesday, 2 March 2011

Workshop 3

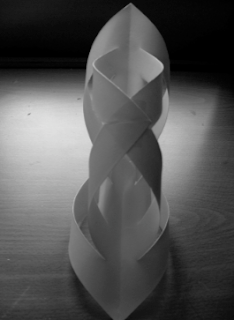
For the 3rd and final workshop with Richard Sweeney we were shown how to make 3D modular forms. This work was all about symmetry, he showed us how to make symmetrical forms using triangles. I decided to create one of the toys you made when you were younger, in which you wrote numbers on the outside and the inside contained a dare or a joke.


Here are my outcomes


I firstly viewed the form from the top .


Then the bottom.


Then finally all 3 forms together.


Tuesday, 1 March 2011

more,more,more flowers

I decided to have another go at making another flower form, this time made out of 7 a4 sheets of white paper.

To create the form i used a previous idea from workshop 2 with Richard Sweeney.


I then decided to make the form look more "petal like" to develop it further twisting and folding the paper in a different way.


After messing around with different ways of folding the paper i came out with this form. To create this i cut 3 diagonal strips into a triangle form, after opening up the triangle (now forming a square) i stuck the strips together on vice versa side.
I went on to make 6 of these all together, and attached them all together to making a flower form.


This was my final outcome, i really like this form and think it would be quite nice to work with, if i was to carry on with this idea i would try making smaller and bigger forms and see what they looked like all together.